Starting with JoomLMS version 2.x we've decided to replace an outdated web-conference tool with the advanced GoToMeeting platform. The platform allows multiple attendees (the exact number depends on your GoToMeeting plan) with screen sharing, video and audio conferencing.
The JoomLMS and GoToMeeting integration allows webinars scheduling within the LMS and user access directly from the course page. Scheduling date, time and attendance emails are sent to GoToMeeting to create a class session. Then, the session data is returned and depicted in your course Webinars section so Students can see it and register for it. The GoToMeeting platform is mobile compatible which means more learners can attend your conference when they are on the go.
To configure the JoomLMS-GoToMeeting integration, follow these steps:
- Register a free trial or a paid account at the GoToMeeting Website and specify the number of organizers upon the registration.
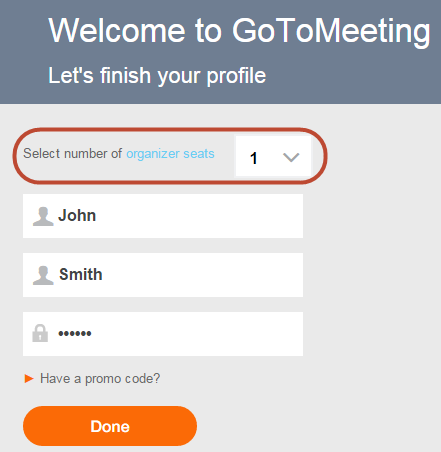
 Note: An organizer is a Teacher that is allowed to create webinars in JoomLMS courses. If you need to organize several webinars within the same time slot (in one or several JoomLMS courses) then it is necessary to register multiple organizers. If you only have one organizer, then this Teacher won't be able to schedule several webinars at the same time slot even in different courses and an error message will be displayed.
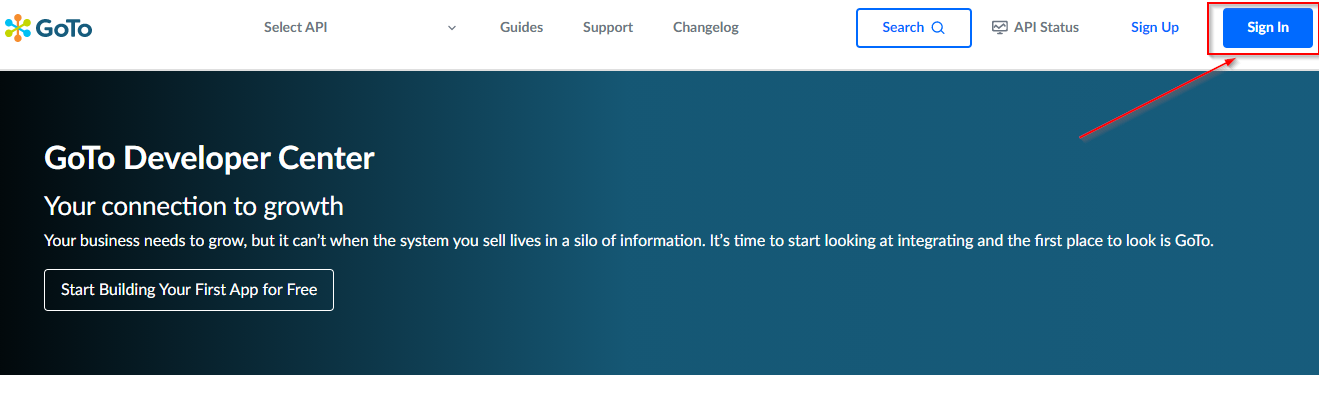
 - Log in at Citrix GoTo Developer Center using the same credentials of the account you have just created at the GoToMeeting website.
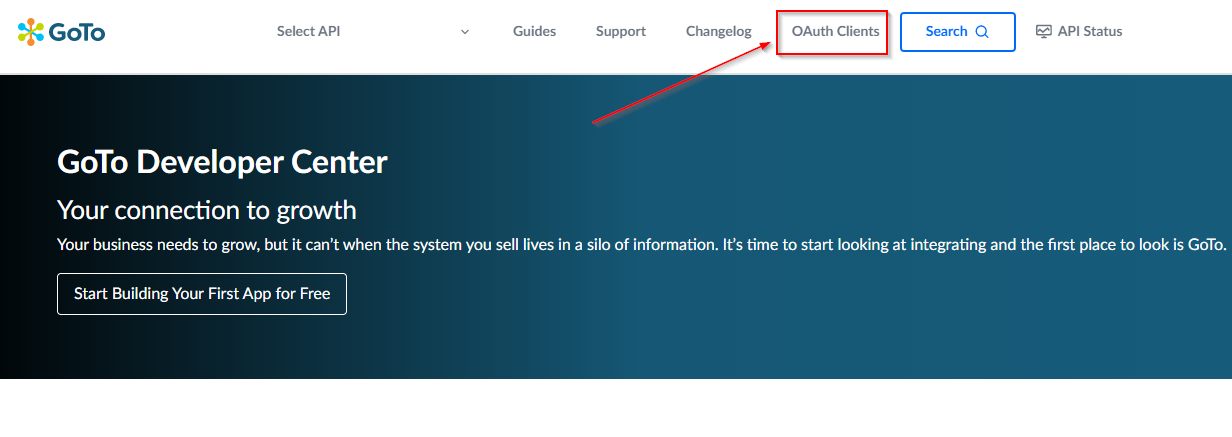
- When logged in, go to OAuth Clients in the top menu.
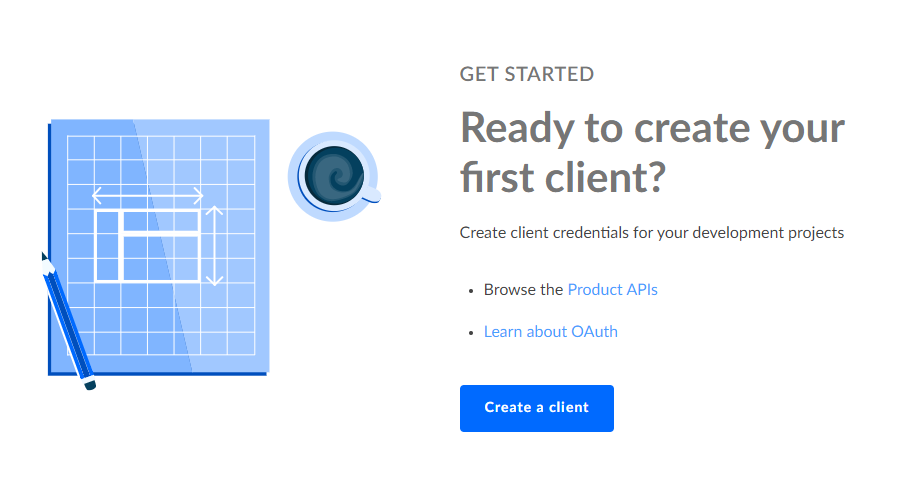
- Create a new OAuth client for your GoToMeeting account in the following way:
- Click Create a client to start configuring the new OAuth client.
- In the Redirect URIs field specify the domain name of the site where your JoomLMS is installed e.g. http://demo.myjoomlms.com. Click Next to move to the next step..

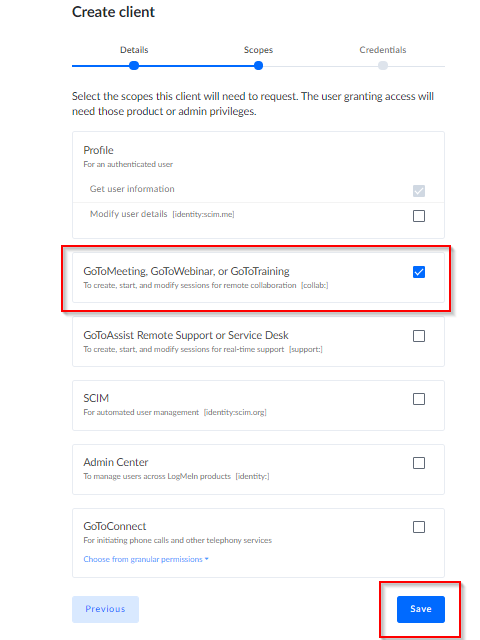
- Under Scopes select the option that includes GoToMeeting and click Save to move to the final step.
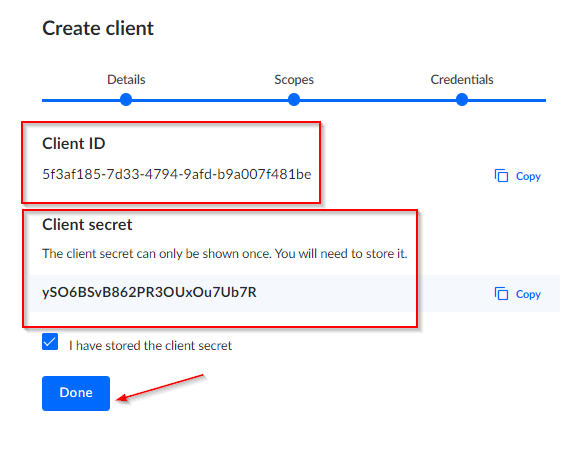
- Copy the Client ID and Client secret to clipboard or a text file. You will be able to re-check the Client ID later but you will only be able to see the Client secret once so make sure you store it. Click Done to complete creating the OAuth client.
- Click Create a client to start configuring the new OAuth client.
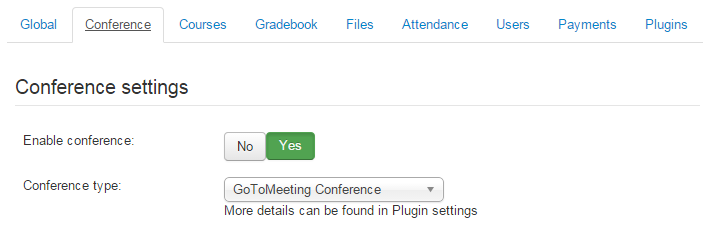
- Go to your site where JoomLMS is installed, then enter the administrator back-end Components > JoomLMS > Configuration > tab Conference, select Yes for Enable conference and GoToMeeting from the Conference type drop-down menu.
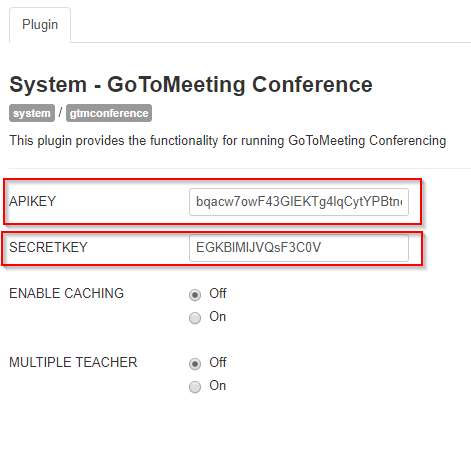
- Go on to back-end Extensions > Plugin manager > System > JoomLMS GoToMeeting, specify Client ID and Client Secret in the API key and Secret key fields respectively, and save the changes.
-
Now you can create webinars in JoomLMS courses. When you access the Webinars tool of the course for the first time you will be redirected to https://goto-developer.logmeininc.com/ to receive authorization for the JoomLMS work with the created application. When you are redirected, log in and then click Allow to allow JoomLMS to work with the GoToMeeting client. You will be redirected back to the course Webinars section where you will be able to start creating new events.
Note: Any Teacher who has no access to the GoToMeeting account won't be able to use the course Webinars tool. Make sure to either provide your company account access to your Teachers or inform them to register an account themselves.