The Course Builder in JoomLMS is the sequence of five steps where various course settings can be configured. You access the Course Builder when you create a new course or when you edit an already existing course.
You can create a new course using the Course Builder in the following way:
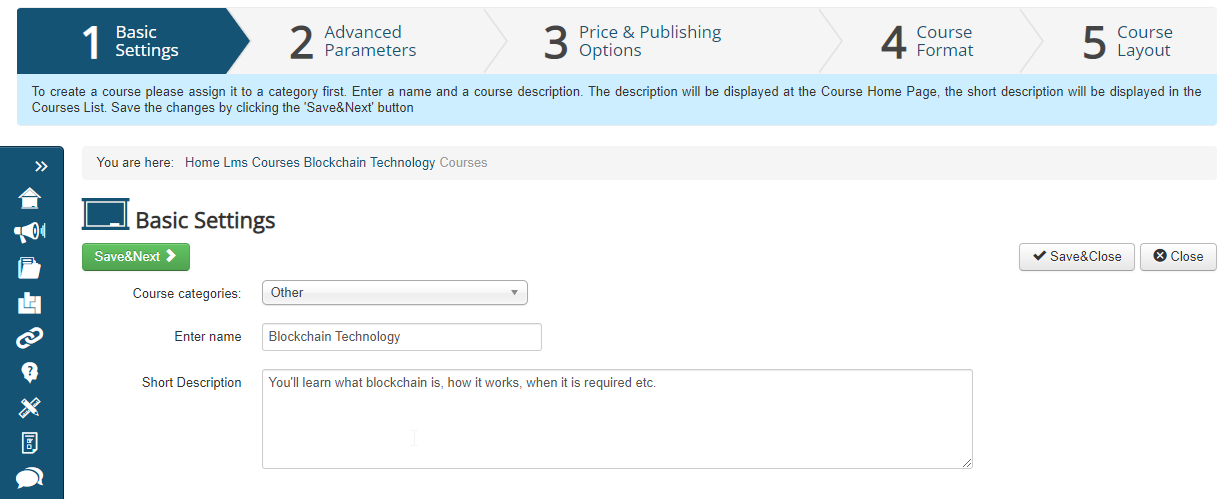
- Go to the LMS Home or Courses List page and click Create a new course. Step 1 - Basic settings - of the Course Builder will open.
- Configure the general parameters for the course:
- Course Categories: select one or several categories/subcategories for the course. For more information on course categories, see Administrator documentation > Course Categories.
- Enter Name: specify the name of your course.
- Short Description: add a short description of the course if necessary. For more details on course short description, see Administrator documentation > Configuration > Courses.
 Note: You can click Save & Close at any of the steps in the Course Builder in order to close it and then return to modifying the course settings later.
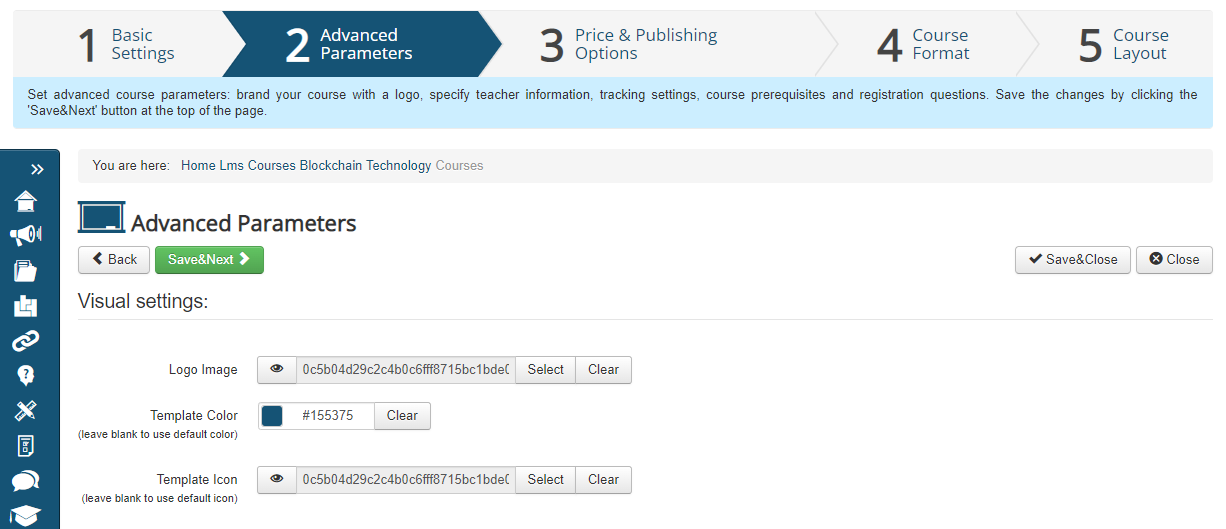
 - Click Save & Next to save the changes. Step 2 - Advanced Parameters - of the Course Builder will open.
- Configure the advanced settings for the course:
- Visual settings
- Logo Image: click Select to choose the image that will be used as course logo; the image selection pop-up window will open. To upload a new image to the available selection, click Upload. To crop the uploaded image, click Crop. To select the course logo image, click it and then click Choose. The image selection window will close automatically. Click Clear to clear the selection.
- Template Color: select the color of the top and left menu for the course internal pages. Click anywhere in the Template Color field to open the color picker. You can either click the color in the picker window to select it or enter the HTML color code manually in the text area of the field.
- Template Icon: choose the image that will be used as the course template icon (displayed in the top left corner at the course internal pages). The procedure is the same as when choosing the Logo Image.
- Teacher information
- Photo: click Select to choose the image that will be used as the teacher's photo; the image selection pop-up window will open. To upload a new image to the available selection, click Upload. To crop the uploaded image, click Crop. To select the teacher's photo, click it and then click Choose. The image selection window will close automatically. Click Clear to clear the selection.
- Full Name: enter the teacher's name.
- Profession: enter the teacher's title.
- Short Information: enter a short description for the teacher's specialization, activities etc.
Note: The Teacher information is only displayed in the course if the JoomLMS Course Teacher module is added to the course layout - see Step 5 for more information. - Tracking settings
- Grading method: select Best scored result if you wish the Gradebook/Tracking section to display the user's attempt with the best result (the complete attempt with the best scored result will be displayed in the Gradebook/Tracking section even if there are newer attempts but with worse results or incomplete ones). Select Last scored result if you wish the Gradebook/Tracking section to display the latest user's attempt (every time a user makes a new attempt, the latest attempt will be displayed in Gradebook/Tracking). For more information on grades see Teacher documentation > Gradebook.
- Course Homepage settings
- Auto redirect to a Learning Path (for Students): select Yes if you want the Students to be automatically redirected to the list of Learning Paths or a specific Learning Path or SCORM immediately after clicking the Open Course button. Select No if you want the Students to be redirected to the Course Home page after clicking the Open Course Button. If Yes is selected the drop-down menu below will become active, select either the list of Learning Paths or a specific Learning Path or SCORM there.
- Show Course Description for learners: select Yes if you wish the course description (added at Step 5) to be displayed to all users. Select No if you wish the course description to be displayed only to the users who are not yet enrolled in the course as Students.
- Other Course settings
- Show SCORM status as: select how you would like the results of SCORM packages to be displayed in the course. Select Use Global if the results in this course should be displayed as configured at back-end Appearance. Select Progressbar if the results should be displayed in the form of a progressbar. Select Text if Yes should be displayed for complete SCORMs and No for incomplete ones. Select Icon if a green check mark should be displayed for complete SCORMs and a red X mark for incomplete ones.
- Show Learning Path status as: select how you would like the results of Learning Paths to be displayed in the course. Select Use Global if the results in this course should be displayed as configured at back-end Appearance. Select Progressbar if the results should be displayed in the form of a progressbar. Select Text if Yes should be displayed for complete Learning Paths and No for incomplete ones. Select Icon if a green check mark should be displayed for complete Learning Paths and a red X mark for incomplete ones.
- Show Quiz status as: select how you would like the results of Quizzes to be displayed in the course. Select Use Global if the results in this course should be displayed as configured at back-end Appearance. Select Points received/Status icon if the number of points scored by the user together with a green check mark for complete Quizzes and a red X mark for incomplete ones should be displayed. Select Points received if only the number of points scored by the user should be displayed. Select Percentage if the user's score in percent should be displayed (if the quiz is incomplete, 0% will be displayed). Select Percentage/Status icon if the user's score in percent together with a green check mark for complete Quizzes and a red X mark for incomplete ones should be displayed. Select Complete/Incomplete if the quiz status should be displayed with words Complete/Incomplete. Select Passed/Failed if the quiz status should be displayed with words Passed/Failed (if the quiz is incomplete, no status will be displayed).
- Resources with prerequisites: select how the Learning Paths or SCORM/AICC packages with prerequisites should be displayed in the course. Select Show if Students should see all Learning Paths/SCORM/AICCs but the items with prerequisites to which they have no access yet should be greyed out. Select Hide if Students should not see the items with prerequisites to which they have no access yet.
- Course Prerequisites
- Course Prerequisites mode: select Do not use prerequisites if you don't want to set any conditions for access to this course. Select Disable enrolment if you want the course to be visible in the Courses List but users who do not complete the prerequisite course(s) should have no access to the course content and instead see a notification that they have to complete the prerequisite course(s) first. Select Hide course if you want the course to be displayed in the Courses List only after the users complete the prerequisite course(s).
- If the Disable enrolment or Hide course mode is selected, click the course that should be assigned as a prerequisite in the Select course(s) field and then click the Right arrow button to move the course to the Added courses field. Repeat if it is necessary to add more than 1 course as prerequisites. To remove the course from Added courses click the course and then click the Left arrow button.
Warning: The course prerequisites only work for the Students enrolling in courses themselves. If a different method of enrolling Students is selected (e.g. a Student purchases a subscription for multiple courses), the prerequisites will be overridden.
- Registration Questions
- Additional Registration Info: Select Yes if you wish the users to submit some additional information when they access the course for the first time after enrolment. Select No if no additional information should be requested.
- If Yes is selected for the previous setting, configure the Course registration question to request additional information. Enter the question under Course registration question, check the Optional? box if answering the question should be mandatory and enter a Default answer to provide an example of a possible answer to this question. Click Add to complete adding the question. It is possible to add more than 1 question. To remove a question click the X button.
- Visual settings
- Click Save & Next to save the changes. Step 3 - Price & Publishing options - of the Course Builder will open.
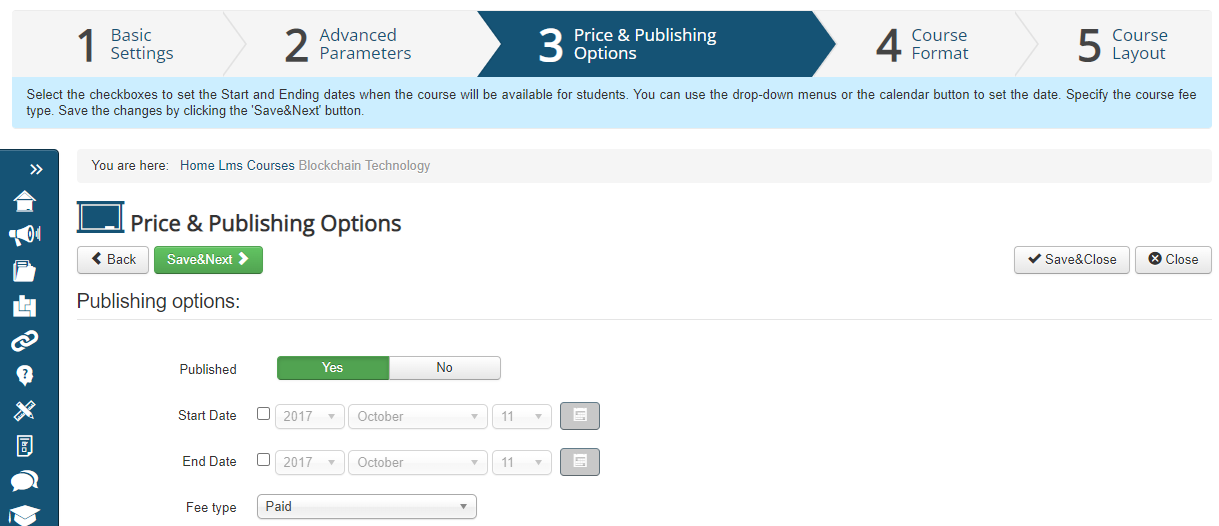
- Configure the publishing and price settings for the course:
- Published: select Yes if the course should be visible for Students in the Courses List. Select No if only the LMS administrators/assigned Teachers and the course author should see the course.
- Start Date: check this box if the course should be available for Students only from a certain date. Specify the date using the drop-down menus or the Calendar icon.
- End Date: check this box if the course should be available for Students only until a certain date.
- Fee Type: select Free from the drop-down menu if users should be able to enrol in the course free of charge. Select Paid if you want the users to purchase access to the course. If Paid is selected, the Paid course subscriptions settings will open on the same page, it is necessary to configure at least one subscription as follows:
- Enter the subscription details: Title, Type, Description (optional) and Price. For more information on subscriptions settings, see Administrator documentation - Subscriptions.
- Click Add to complete creating the subscription. You can add as many different subscriptions for this course as you wish.
- Click Save & Next to save the changes. Step 4 - Course Format - of the Course Builder will open.
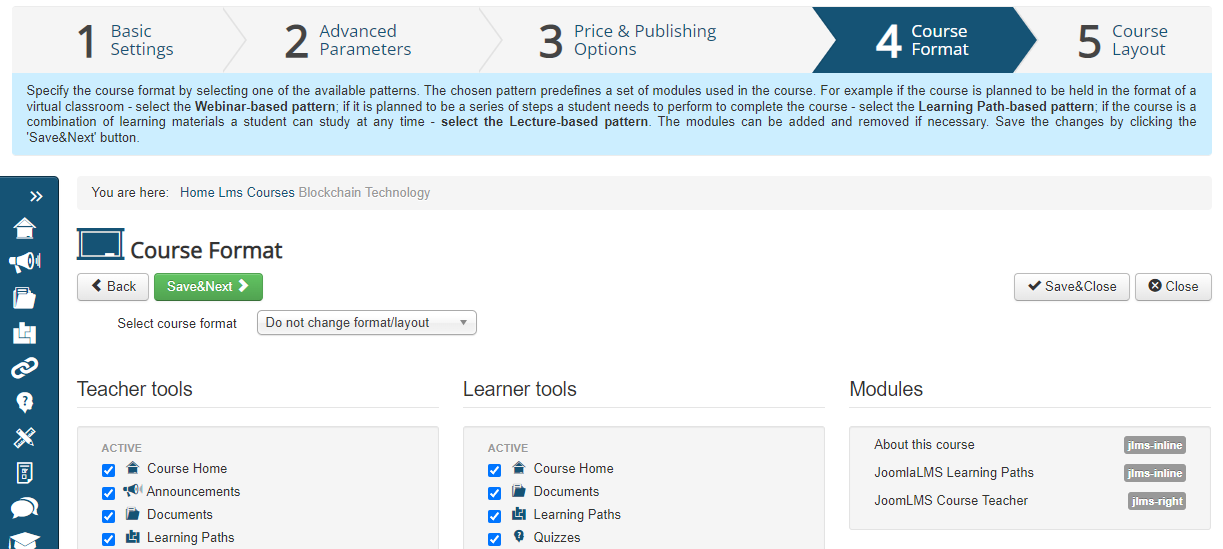
- Configure the course menu format for the course:
- Select course format: Select one of the following format patterns for the course menu if you wish to see the course menu suggestions based on the planned type of the course.
- The Learning Path-based format suggests the course menu pattern for the courses where the main element is going to be a sequence of course materials that Students should take in a certain order, called a Learning Path, or multiple Learning Paths. For more information, see Learning Paths.
- The Lecture-based (materials-based) format suggests the course menu pattern for the courses where the main element is a set of various course materials that Students can take in any order.
- The Webinar-based format suggests the course menu pattern for the courses where the main element is a video conference or a webinar. For more information, see Webinars.
- Teacher tools/Learner tools: Check one or more course menu items if you wish to additionally include them in the course menu for Teachers/Students. Uncheck one or more course menu items to remove them from course menus.
Note: The list of modules here corresponds to the selected format pattern and is displayed just for your information. Modules can be modified only at Step 5 of the course builder. - Select course format: Select one of the following format patterns for the course menu if you wish to see the course menu suggestions based on the planned type of the course.
- Click Save & Next to save the changes. Step 5 - Course Layout - of the Course Builder will open.
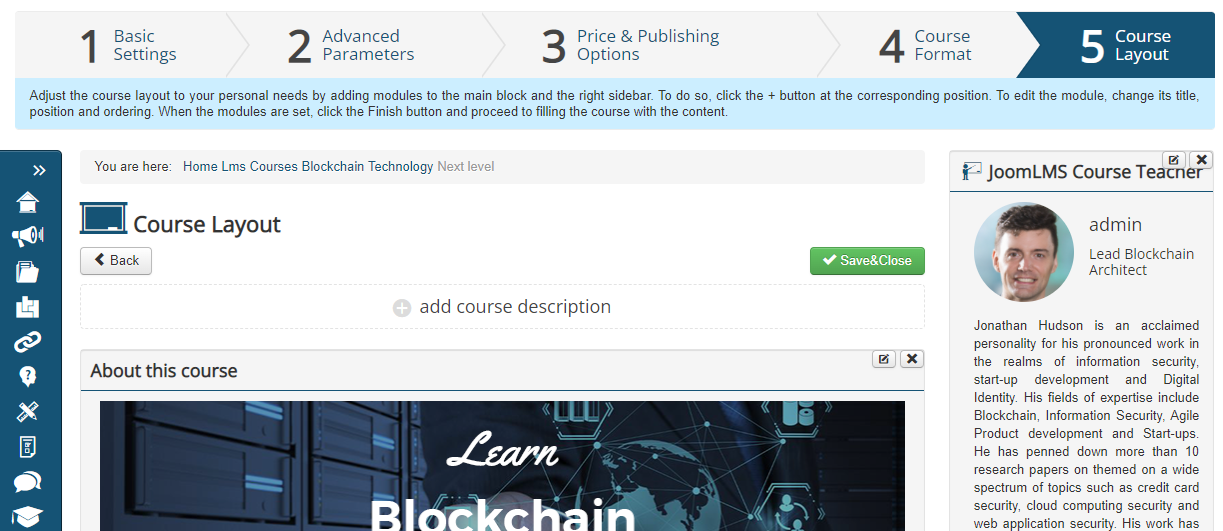
- Configure the course modules layout for the course:
- Add Course Description: click to add a course description. The description will be displayed at the Course Home page at the top of the page under the Course details.
- Add module: click to add one of the native JoomLMS modules. Each module has a short description next to its name, explaining its purpose. If you click Add module at the centre of the page, the resulting module will be only displayed at the Course Home page under Course details. If you click Add module on the right, the resulting module will be displayed in the right-hand column on each page of the course. You can add multiple modules for both positions.
- Click Save & Close to complete creating the course and close the course builder. The course will be created with the configured parameters.