Topics allow Teachers to organize quick and easy navigation to any course resource (Documents, Links, Learning Paths etc.) for Students. This course tool works as a frame for displaying selected course elements at the Course Home page. Creating Topics is one of the ways to organize the Course structure.
Adding a Topic
- Go to the Course Home page and click the Add topic (
 ) button. The page with the new topic settings will open.
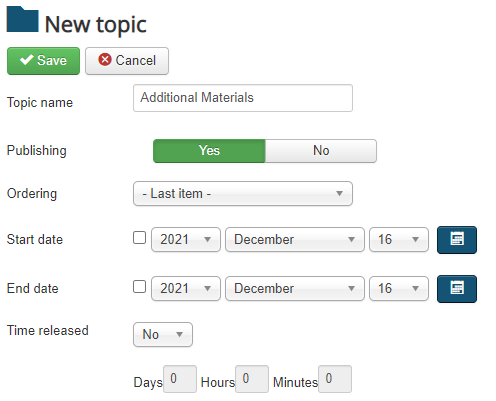
- Configure the Topic settings according to your preferences:
- Topic name: specify the name for the Topic. It will be displayed in the Topic header.
- Publishing: select Yes if the Topic should be visible to Students or No if you don't want the Students to see it yet.
- Ordering: select the position for the Topic in the list of Topics at the Course Home page.
- Start date: select the date when the Topic should become available for Students, if any. You can select the date from the drop-down menus for Day/Month/Year or pick it from the Calendar by clicking the Calendar (
 ) icon.
 - End date: select the date when the Topic should stop being available for Students, if any.
- Time released: If you wish this Topic to become published in a certain period after the Student's enrollment you can use this feature to determine a period of time after which the Topic will be published. Select Yes if you wish to enable this feature and the fields on the next line below will become active. Enter the necessary time period in days, hours or minutes in the respective fields.
- Description: enter the description for the Topic, if necessary. It will be displayed in the Topic header under its name.
- Click Save to save the new Topic. You will see it at the Course Home page.
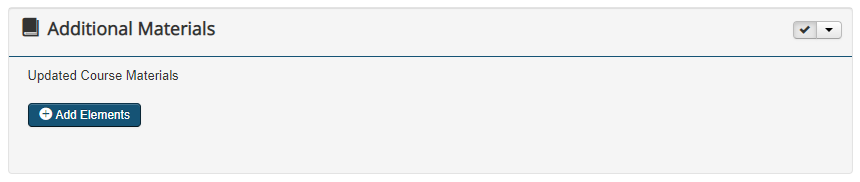
Adding elements
You can add various course resources to the Topic in the following way:
- Click the Add elements (
 ) button at the top of the Topic. You will be redirected to the page with all the existing course resources.
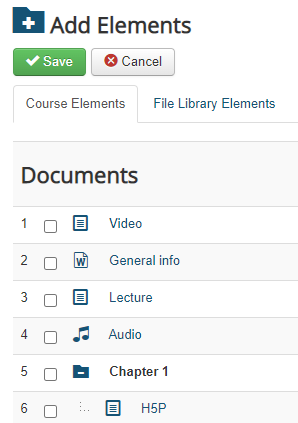
- Check the boxes next to the elements you wish to include in the Topic and save the changes. You will be redirected back to the Course Home page where the selected elements will be included in the Topic.
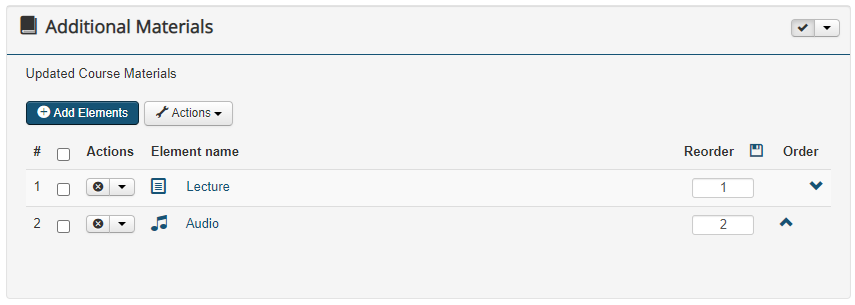
- Publish those elements that should be visible for Students in the Topic. To publish an element either click on the icon next to it or check the box next to the element and click Actions > Publish.

Warning: All the added elements are unpublished at first by default so make sure to publish those you wish to be accessible for your Students, otherwise the Students will not be able to see them in the Topic.
Managing a Topic
You can manage various parameters via the following two buttons in the top right corner of the Topic:
- The Published/Unpublished switch allows you to publish or unpublish the whole Topic by clicking on it. When the Topic is unpublished it will become invisible for Students completely, together with the included course materials (even if some materials are still published).
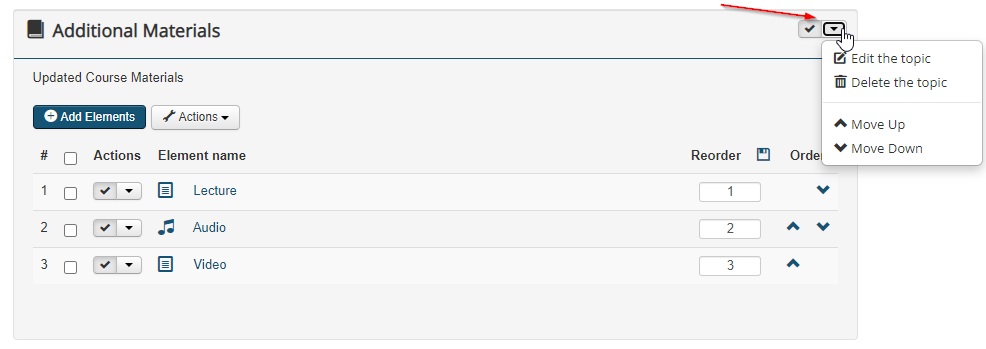
- The drop-down menu button allows you to access the following options:
- Edit the topic: click this option to enter the Topic settings management page.
- Delete the topic: click this option to completely remove the Topic from the Course Home page.
 Note: When you delete a Topic, the course materials that were added to it as elements will not be removed from the course and will remain in the respective course sections.
Warning: If you choose to delete the Topic, it will be removed from the course completely and there will be no way to restore it.
- Move Up/Move Down: use these options to change the position of the Topic in the list of Topics at the Course Home page (when you have multiple Topics added).